Planning an event in Florida almost always means eyes on the backdrop and everyone wants photos worth remembering. Think a generic step and repeat will do the trick. More than 70 percent of event organizers say photo quality and branding from these banners directly boost their guests’ engagement and post-event buzz. Sounds simple, right. Yet most banners end up either too small, awkwardly placed, or washed out in photos. The real edge isn’t just picking the right size but nailing a few Florida-specific details nobody else thinks about.
Table of Contents
- Choosing The Right Step And Repeat Size
- Understanding Standard Banner Dimensions
- Calculating The Right Size For Your Event
- Technical Considerations For Banner Selection
- Best Locations In Florida For Step And Repeat
- Urban Event Locations
- Natural And Cultural Venues
- Strategic Venue Selection Considerations
- Step-By-Step Setup Process Explained
- Equipment And Preparation
- Banner Installation Techniques
- Lighting And Final Adjustments
- Expert Tips For Perfect Photos And Branding
- Logo Design And Placement Strategies
- Photographic Technique Optimization
- Technical Refinement And Branding Consistency
Quick Summary
| Takeaway | Explanation |
| Choose the Right Banner Size | Select dimensions based on guest count and photography style for optimal visual appeal. |
| Select Ideal Event Locations | Consider urban and natural venues in Florida that enhance the backdrop and branding experience. |
| Utilize Proper Installation Techniques | Use correct equipment and methods during setup to ensure a professional and visually appealing display. |
| Optimize for High-Quality Photos | Position subjects effectively and use soft lighting to improve photo quality and logo visibility. |
| Ensure Brand Consistency | Align the banner design with other event materials for a cohesive branding experience across all elements. |
Choosing the Right Step and Repeat Size
Selecting the perfect step and repeat banner size requires careful consideration of your event’s specific requirements and characteristics. The right dimensions can dramatically enhance your event’s visual appeal and photographic potential.
Understanding Standard Banner Dimensions
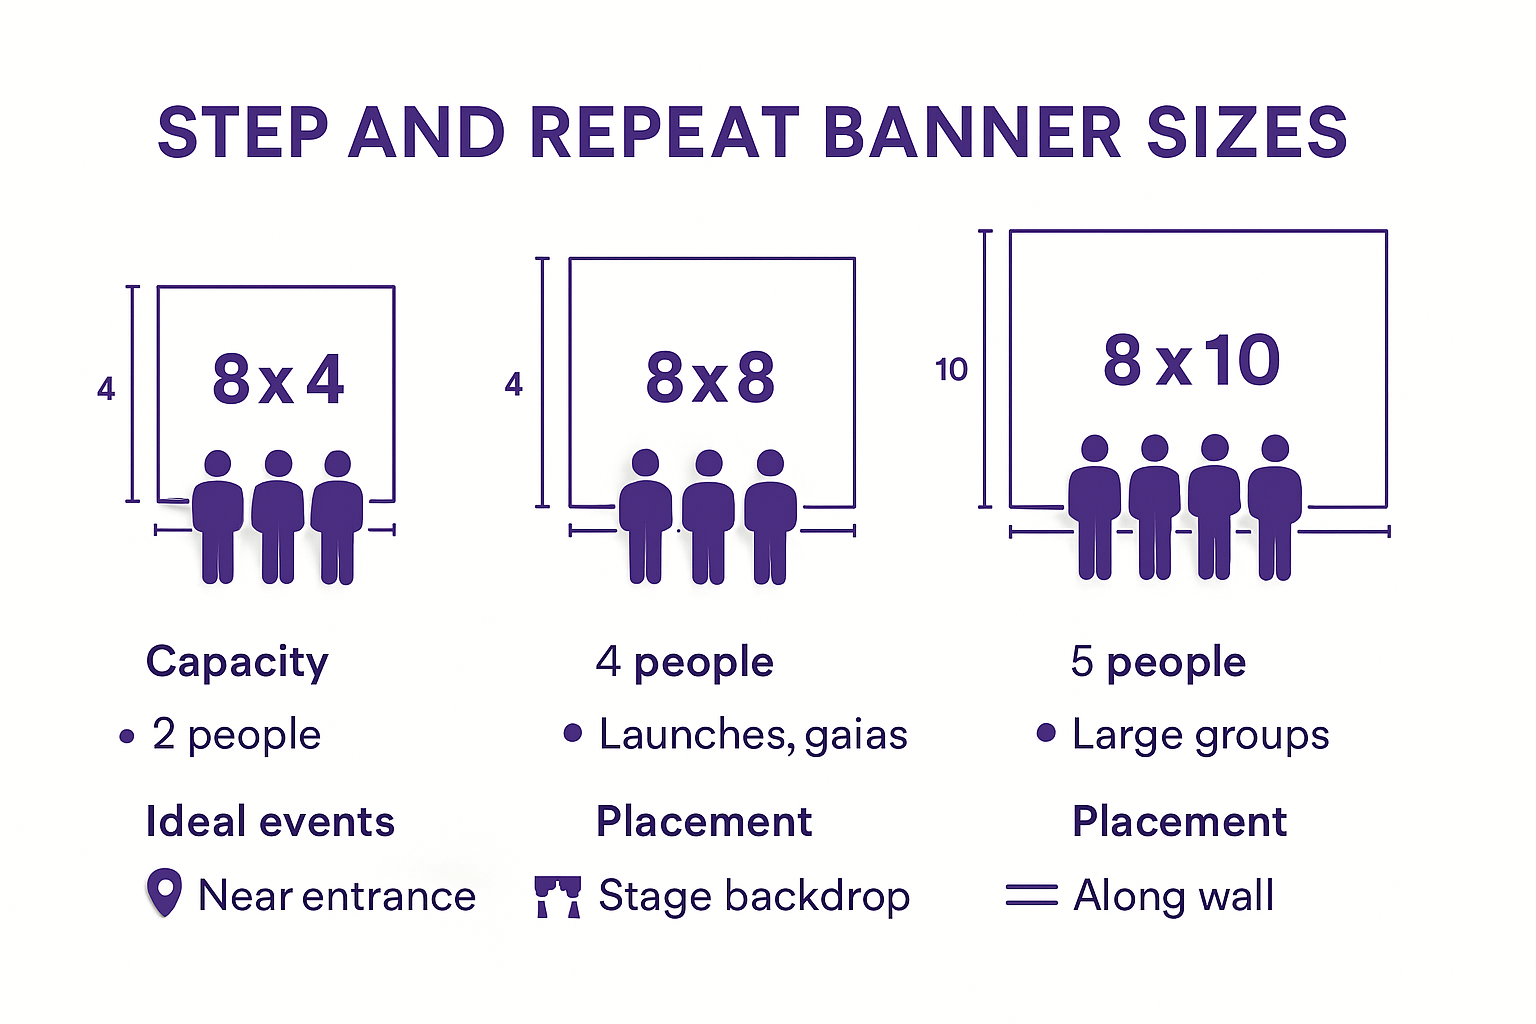
Step and repeat banners typically come in several standard sizes that cater to different event types and group configurations. An 8-foot tall banner serves as the industry standard height, accommodating most individuals while providing ample vertical space for photography. Width becomes the more flexible dimension, with common options ranging from 4 to 12 feet.
For smaller events with limited guest numbers, an 8×4 foot banner works well. These compact backdrops are ideal for intimate gatherings or situations where space is at a premium. Medium-sized events often benefit from an 8×8 foot banner, which provides enough room for pairs or small groups to take photographs comfortably.
Larger events demanding more extensive backdrop coverage might require an 8×10 or 8×12 foot banner. These wider configurations support larger group photos and provide more visual real estate for logo placement and branding opportunities. The key is matching banner dimensions to your anticipated guest count and photography requirements.
To help you choose the right banner size for your event type and group configuration, here’s a summary table comparing common step and repeat banner dimensions:
| Banner Size (WxH, ft) | Recommended Group Size | Typical Use Case |
| 8×4 | 1-2 | Small events, tight spaces |
| 8×8 | 2-4 | Medium-size events, small groups |
| 8×10 | 4-6 | Larger groups, corporate events |
| 8×12 | 6-8+ | Large events, galas, wide photos |
Calculating the Right Size for Your Event
Determining the optimal step and repeat size involves more than just measuring physical space. Consider the number of people likely to be photographed simultaneously and the expected photography style. Individual portrait shots require less width compared to group photos where multiple individuals will pose together.
A good rule of thumb is allocating approximately 3 feet of width per person when planning group photographs. For events expecting six to eight people to pose together, an 8×8 or 8×10 foot banner provides comfortable coverage. Larger corporate events or galas might necessitate even wider banners to accommodate larger groups while maintaining aesthetic appeal.
Photographic positioning matters significantly. Photographers typically recommend placing subjects approximately 6 to 8 feet from the banner to capture clean, crisp images without casting shadows. This distance allows logos and background designs to remain prominent and easily recognizable in photographs.
Technical Considerations for Banner Selection
Beyond physical dimensions, material quality and mounting options play crucial roles in step and repeat banner effectiveness. Fabric banners offer lightweight, wrinkle-resistant options that photograph exceptionally well. Vinyl banners provide durability and crisp logo reproduction, making them excellent for events requiring high visual fidelity.
Consider your venue’s infrastructure when selecting banner size. Confirm available mounting points, ceiling height, and floor space to ensure smooth installation. Some venues might have specific limitations that impact your banner dimensions, so advance planning becomes essential.
Remember that a well-designed step and repeat banner serves multiple purposes. It functions not just as a photographic backdrop but as a powerful branding tool that captures event memories and promotes your organization’s visual identity. Investing time in selecting the right size ensures your banner becomes a memorable centerpiece of your event’s visual experience.
Best Locations in Florida for Step and Repeat
Florida offers an extraordinary array of stunning locations for setting up step and repeat banners, each providing unique visual backdrops that can elevate your event’s photographic experience. From vibrant urban landscapes to breathtaking natural settings, the Sunshine State presents photographers and event planners with remarkable opportunities to create memorable visual moments.
Urban Event Locations
Miami stands out as a premier destination for step and repeat events, with its dynamic cityscape and world-renowned venues. South Beach provides an iconic backdrop with its Art Deco architecture and pristine beaches. The Wynwood Arts District offers colorful murals and industrial chic spaces perfect for creative event photography. Convention centers in Miami and Orlando provide professional indoor environments with controlled lighting and expansive areas suitable for large corporate gatherings.
Downtown areas in cities like Fort Lauderdale and Tampa feature modern architectural elements that create sophisticated backdrops. Rooftop venues in these urban centers offer panoramic city views that add dramatic flair to step and repeat setups. Waterfront locations along Brickell or Miami Beach present opportunities for stunning photography with skyline and ocean perspectives that capture Florida’s unique aesthetic.
Natural and Cultural Venues
Florida’s state parks and cultural sites present extraordinary alternatives to traditional event spaces. The Timucuan Ecological and Historic Preserve near Jacksonville offers diverse landscapes ranging from coastal scenes to historic sites. Anastasia State Park provides stunning natural backdrops with its pristine beaches and maritime forests. These locations allow event planners to integrate Florida’s natural beauty directly into their step and repeat designs.
Cultural venues like museums in St. Petersburg, historic sites in St. Augustine, and botanical gardens throughout the state offer refined settings with architectural and natural elegance. The Salvador Dali Museum, for instance, provides a surreal backdrop with its distinctive design, while the gardens of Vizcaya in Miami create an opulent Mediterranean-inspired environment perfect for high-end events.
To help you choose the most suitable location type for your step and repeat banner in Florida, here is a comparison table of urban, natural, and cultural venues and their features:
| Venue Type | Example Locations | Key Features |
| Urban | Miami (South Beach, Wynwood, Brickell), Tampa | Cityscape, modern architecture, indoor/outdoor |
| Natural | Anastasia State Park, Timucuan Preserve | Beaches, forests, natural lighting, open space |
| Cultural | Salvador Dali Museum, St. Augustine, Vizcaya | Historic/architectural elegance, gardens, refined |
Strategic Venue Selection Considerations
Choosing the right location involves more than aesthetic appeal. Consider factors such as lighting conditions, available mounting options for banners, and venue restrictions. Indoor venues offer consistent lighting and climate control, while outdoor locations provide natural illumination and unique environmental contexts.
Photographic logistics matter significantly. Ensure your chosen location allows sufficient space for banner setup, provides appropriate backdrop distances, and accommodates potential group sizes. Some venues might have specific requirements regarding banner dimensions, installation methods, and photography permissions.
Consider the time of day and seasonal variations. Florida’s tropical climate means early morning or late afternoon events can provide softer lighting conditions ideal for photography. Venues with multiple backdrop options allow flexibility in creating diverse photographic experiences.
Remember that a well-selected location transforms a simple step and repeat setup into a memorable visual storytelling opportunity. Whether you choose a sleek urban setting or a natural Florida landscape, the right venue can dramatically enhance your event’s visual impact and create lasting memories for participants.
Step-by-Step Setup Process Explained
Setting up a step and repeat banner requires careful planning and precise execution to ensure a professional and visually appealing result. The process involves multiple critical stages that transform your event space into a branded photographic backdrop.
Equipment and Preparation
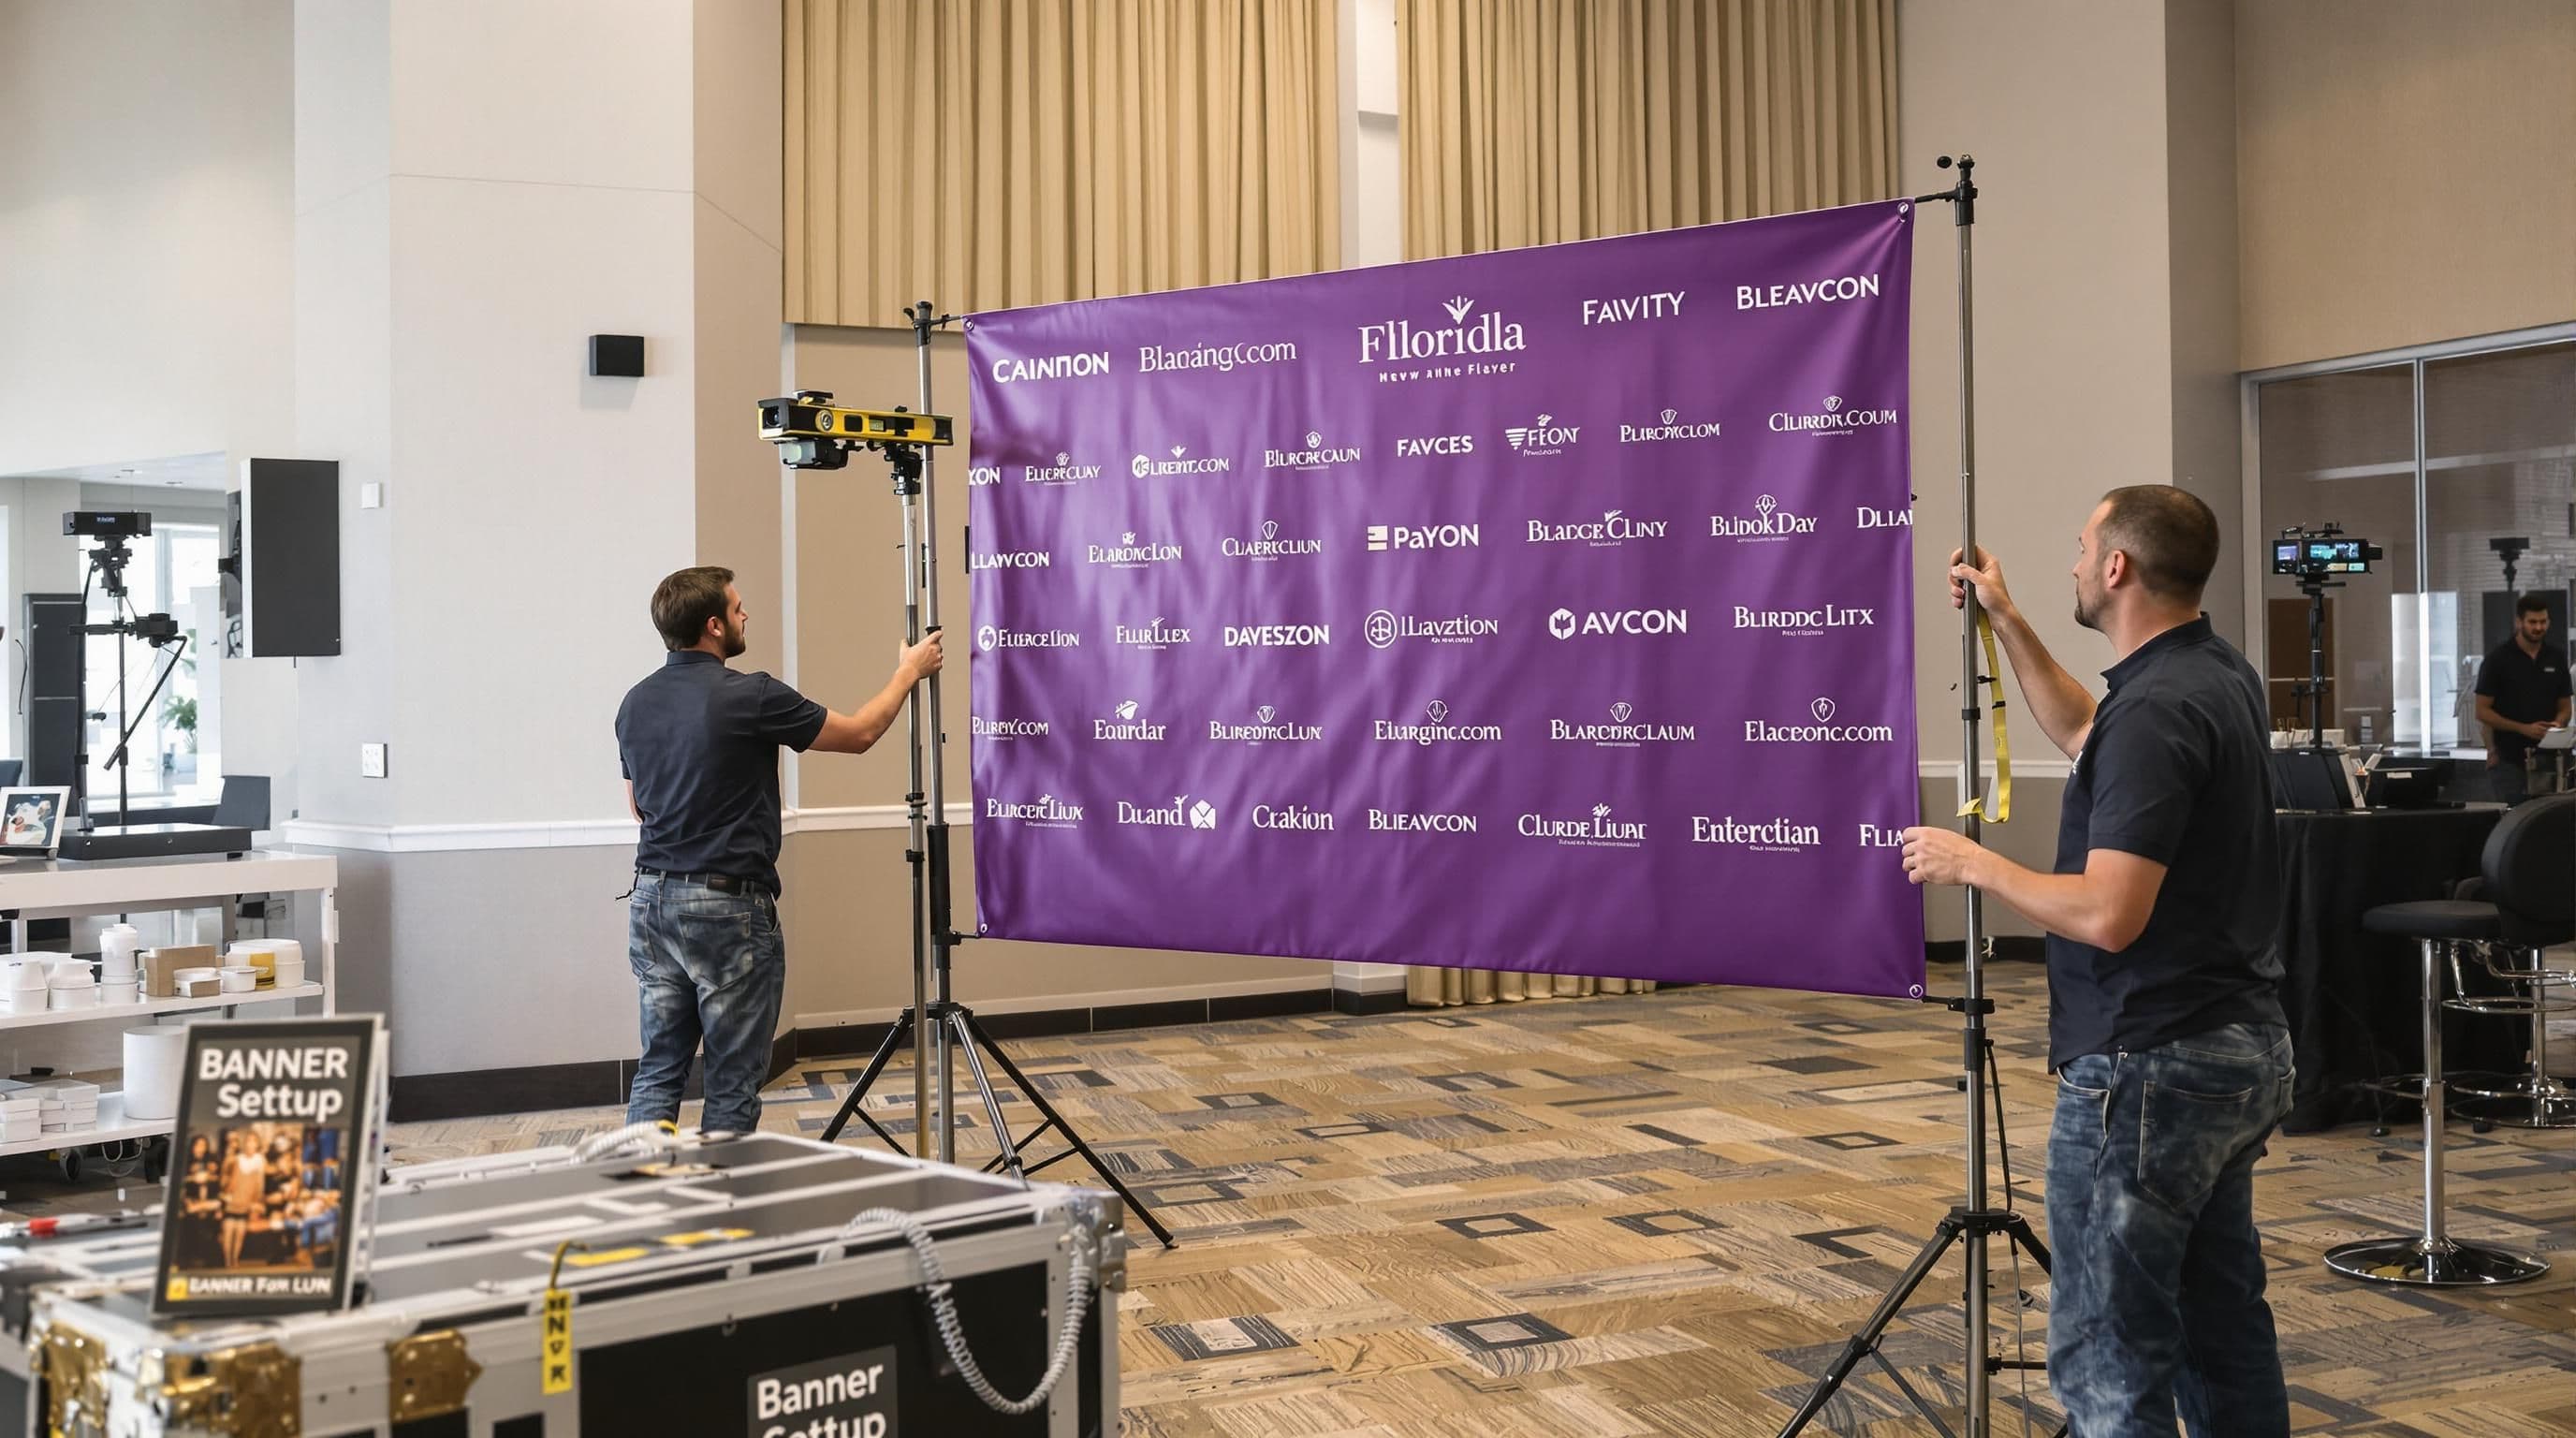
Before beginning the installation, gather all necessary equipment. You will need a sturdy banner stand, the printed step and repeat backdrop, measuring tape, level, mounting hardware, and potentially a ladder depending on your venue’s specifications. Select a banner material that minimizes glare and wrinkles such as fabric or matte vinyl to ensure high-quality photographs.
Carefully inspect your banner for any manufacturing defects or printing inconsistencies before installation. Check that logos are correctly positioned and colors are vibrant. Bring backup mounting supplies like additional clips, gaffer tape, or zip ties in case of unexpected installation challenges. Having a comprehensive toolkit will help you address potential issues quickly and professionally.
Measure your designated installation area precisely. Confirm ceiling height, available mounting points, and floor space to ensure your banner will fit perfectly. Professional event planners recommend creating a detailed setup diagram in advance, marking exact banner placement and identifying potential lighting or structural constraints.
Banner Installation Techniques
Begin by assembling the banner stand according to manufacturer instructions. Most step and repeat stands feature telescoping poles and adjustable width settings to accommodate different banner sizes. Ensure the stand is level and stable before attaching the banner. Use a spirit level to confirm horizontal alignment and prevent awkward photographic angles.
When attaching the banner, start from the top center and work outward to minimize wrinkles and ensure even tension. Professional installers recommend using tension poles or built-in support systems that keep the backdrop taut and smooth. Carefully clip or secure the banner’s edges, checking that no loose fabric or unsightly folds interrupt the visual design.
Position the banner approximately 6 to 8 feet from the primary photography area. This distance allows photographers to capture full-body shots while maintaining clear logo visibility. Consider the typical height of event attendees and adjust banner placement to ensure most subjects will be fully framed during photographs.
Lighting and Final Adjustments
Lighting plays a crucial role in step and repeat banner photography. Avoid direct overhead lighting that creates harsh shadows. Instead, use soft, diffused lighting positioned at 45-degree angles to the backdrop. This technique minimizes glare and ensures logos appear crisp and readable in photographs.
Test your setup by taking several sample photographs from different angles. Review these images to confirm logo clarity, backdrop smoothness, and overall visual appeal. Make minor adjustments to lighting, banner tension, or stand positioning based on these test shots.
Consider the flow of event traffic when finalizing banner placement. Ensure the setup does not obstruct walkways or create bottlenecks. Mark the precise photography spot with discrete floor markers to guide guests and maintain a smooth photographic process.
A meticulously prepared step and repeat banner transforms an ordinary event space into a professional branding opportunity. By following these detailed setup guidelines, you will create a stunning backdrop that captures memorable moments and effectively showcases your organization’s visual identity.
Expert Tips for Perfect Photos and Branding
Creating a memorable step and repeat experience goes beyond simply hanging a banner. Strategic design and technical execution can transform your backdrop into a powerful branding tool that captures attention and creates lasting visual impressions.
Logo Design and Placement Strategies
Effective logo design represents the cornerstone of an exceptional step and repeat banner. Select high-resolution logo files that maintain crisp details when enlarged. Avoid complicated designs that lose clarity when reproduced at larger scales. Typically, logos should occupy approximately 25% to 35% of the total banner space, creating a balanced and professional appearance.
Consider color contrast carefully when designing your backdrop. Light logos work best on darker backgrounds, while dark logos pop against lighter backgrounds. Aim for complementary color schemes that enhance logo visibility without creating visual fatigue. Professional designers recommend using matte or textured backgrounds that minimize glare and ensure logos remain the focal point of photographs.
Space logos strategically across the banner to create visual rhythm. Standard practice involves creating a consistent pattern where logos are equally distributed, preventing clustering and ensuring each brand representation receives equal prominence. Maintain consistent spacing between logo iterations to create a professional and intentional design aesthetic.
Photographic Technique Optimization
Photography quality determines the ultimate success of your step and repeat setup. Professional photographers recommend positioning subjects approximately 6 to 8 feet from the banner to minimize shadows and maximize logo visibility. Use soft, diffused lighting positioned at 45-degree angles to eliminate harsh shadows and ensure even illumination across the backdrop.
Train event photographers or designated staff on optimal photographic techniques. Instruct them to position subjects centrally, capturing full-body shots that showcase both the individual and the branded backdrop. Encourage consistent posing guidelines that create a cohesive visual narrative across multiple photographs.
Consider providing simple posing guidance for event participants. Clear instructions like standing slightly angled, maintaining good posture, and facing the camera can dramatically improve photograph quality. Some events even create small floor markers to help guests understand ideal positioning relative to the backdrop.
Technical Refinement and Branding Consistency
Technical precision separates amateur setups from professional productions. Invest in high-quality printing that ensures logo reproduction maintains color accuracy and sharp details. Select banner materials specifically designed for event photography, prioritizing wrinkle-resistant fabrics or tension-based mounting systems that create smooth, professional backdrops.
Maintain consistent branding across all visual elements. Coordinate banner design with other event materials like programs, signage, and digital presentations to create a unified visual experience. This holistic approach reinforces brand messaging and creates a memorable, professional atmosphere.
Consider creating multiple banner configurations for different event scenarios. A versatile approach might include vertical and horizontal logo arrangements, allowing flexibility across various event types and photography requirements. Some organizations develop interchangeable banner panels that can be quickly swapped to match specific event needs.
Remember that a step and repeat banner represents more than a photographic backdrop. It is a strategic branding opportunity that communicates your organization’s visual identity, professionalism, and attention to detail. By implementing these expert techniques, you transform a simple banner into a powerful marketing tool that generates lasting visual memories.
Frequently Asked Questions
What size should my step and repeat banner be for my event in Florida?
The ideal size for a step and repeat banner depends on the number of guests and the expected photography style. For small events, an 8×4 foot banner is suitable, while medium and larger events may require 8×8, 8×10, or 8×12 foot banners for optimal group photo coverage.
Where are the best locations in Florida for setting up a step and repeat banner?
Popular locations include urban settings like South Beach in Miami and the Wynwood Arts District, as well as natural spots like Anastasia State Park. Cultural venues such as the Salvador Dali Museum also provide visually appealing backdrops.
How do I set up a step and repeat banner correctly?
Begin by gathering necessary equipment, such as a sturdy banner stand and mounting hardware. Measure the installation area to ensure proper fit, assemble the banner stand, attach the banner securely, and adjust the positioning for optimal photography angles and lighting quality.
What are the best lighting techniques for photographing step and repeat banners?
Soft, diffused lighting at 45-degree angles is recommended to minimize shadows and glare. This setup ensures that logos are clear and visible in photographs while enhancing the overall quality of the images.
Make Your Step and Repeat Stand Out in Florida with Titans of Print
Tired of photo backdrops that fall short or look unprofessional at your biggest events? Many Florida organizers struggle with choosing the right step and repeat size, battling poor logo visibility, or dealing with tricky venue logistics. When it comes to capturing event buzz and making your brand memorable, every detail matters. Your guests deserve a photo-ready setup that feels premium from the very first snap.
Let Titans of Print handle the details so you do not have to stress about setup headaches or blurry banners. We manufacture custom step and repeats, print branding materials, and install everything for a flawless event in Miami and across Florida. Ready for seamless photo ops and branding that pops? Explore your options and start your custom order today at Titans of Print. Do not let your next Florida event settle for less. Visit our site now and claim your standout display.

